By Ken Miyamoto · July 14, 2022
Welcome to another installment of our new series The Hero’s Journey Breakdown where we explore Joseph Campbell’s mythological storytelling structure and how iconic films fit into that mold.
Christopher Vogler’s approach to The Hero’s Journey broke the mythical story structure into twelve stages. For this series, we define the stages in simplified interpretations:
To offer up a great example of The Hero’s Journey, we turn to the classic Die Hard.
Note: As with any application of story structure or formula, this is just a hindsight interpretation and implementation of The Hero’s Journey to this cinematic tale. There can and will be variances.
John McClane is a New York Detective caught in a failing marriage, as his wife and kids have relocated to Los Angeles. His wife Holly couldn’t resist taking the opportunity to pursue her career, which has led her to the Nakatomi Corporation.
John is taken by limo to the Nakatomi Tower where the corporation is based in the United States.
We learn about the relationship struggles between John and Holly through moments between John and his limo driver, as well as John and Holly when they finally come face-to-face amidst the chaos of a company Christmas party going on within the building.
John agrees to stay with Holly and the kids, as opposed to staying with his old captain in Pomona, a long drive through traffic from Los Angeles.
This keeps him in the building as Holly must make an appearance at the party.
As John makes “fists with his toes” to relieve the jet lag he’s feeling, Hans Gruber and his henchmen take over the building and take Holly and the rest of the company employees hostages.
John is quickly forced into action as he grabs his sidearm and rushes up the stairwell once he sees that he’s outgunned.
John is not a seemingly invincible hero like John Rambo (Rambo franchise) or John Matrix (Commando). He may be a cop with a gun, but he’s still mortal.
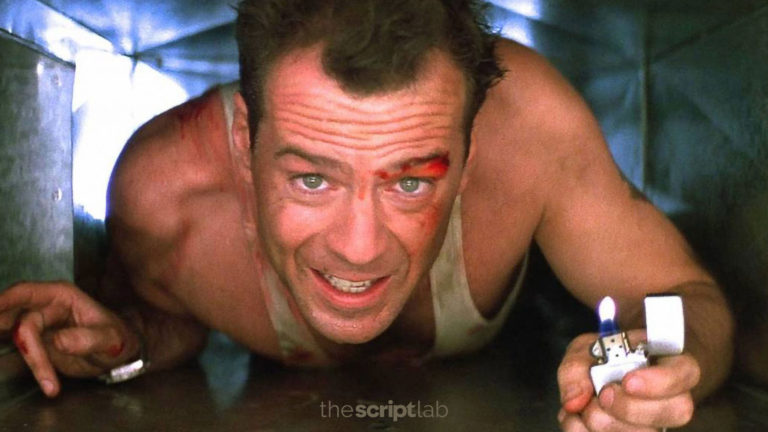
He knows he’s outgunned and retreats to the upper levels of the building, spending a good deal amount of time hiding from Hans Gruber and his men.
When he discovers that the phones have been disconnected, his eyes fall on a fire alarm. Hans sends one of his men to investigate. John kills him and takes his weapon and radio, the latter of which he uses to contact the LAPD from the roof. The conversation is cut short as John is attacked.
The LAPD sends a patrol car to investigate. This is where we meet John’s mentor, Al Powell. Al is fooled into thinking that everything is fine within the building. He goes back to his patrol car and is headed out.
In the meantime, John has taken out two more of Hans’s men. When he sees Al’s patrol car driving away, he decides to take matters into his own hands to get the LAPD to the Nakatomi Tower.
John thrusts the dead body of one of the henchmen down to Al’s car. Al is then attacked by some more of Hans’s men as he backs up to safety and calls for backup.
Al and John create a bond later on in the story as Al reveals to John through the radio that he’s usually a desk cop after an incident where he shot a kid. He hasn’t drawn his weapon since.
Their friendship blossoms throughout the second and third acts of the story as Al helps John on the ground and with the LAPD, giving him the information John needs to maneuver through his own survival and attempts at saving the hostages — namely his wife, Holly.
John reveals himself to Hans on the radio. He also reveals the men that he’s killed thus far, as well as the knowledge that he has about the rest of Hans and his crew.
John truly crosses the threshold when Hans asks, “Do you really think you have a chance against us, Mr. Cowboy?”
In John’s eyes, the challenge has been accepted as he responds, “Yippee-ki-yay, motherf***er.”
John is tested in every direction. He is up against Hans and his henchmen, taking many of those men out one or a few at a time.
He’s also getting resistance from the LAPD in the form of Al’s boss. And Al has proven to be a great ally.
John proves time and time again that he’s up to the task, especially compared to what the LAPD attempts to do. While their SWAT team is being taken out, John saves them by blowing up a whole floor of the building where Hans’s men attack an armored SWAT vehicle.
John comes face-to-face with Hans himself, who poses as a hostage. But we quickly learn that John is up to the test as he tricks Hans into thinking that he believes him. Just when John has the upper hand, Hans’s men enter, attacking John.
The firefight is immense. John is later injured after Hans and his men “shoot the glass” around him during the firefight. Because he’s been barefoot the whole time — which Hans noticed during their first face-to-face interaction — John is forced to flee to safety through the floor of broken glass, embedded shards deep within this foot. And now Hans has the detonators back.
John calls Al on the radio and tells him to deliver a heartfelt message to his wife in case he doesn’t make it.
The FBI takes control of the situation. They decide to shut off power to the building, but Hans has anticipated this move and uses the power outage to disable the final lock of the vault they are trying to break into. When Gruber demands a helicopter on the rooftop for transport, the FBI prepares to double-cross him by sending helicopter gunships.
Hans discovers that Holly is John’s wife. He takes her hostage as they move the hostages to the roof.

‘Die Hard’
John discovers that Gruber intends to detonate the explosives on the roof, killing the hostages and faking the deaths of his team so they can escape with the bearer bonds.
Just as John is going to give Al the information about the double-cross, Karl — Hans’s top henchman and brother of a henchman that John killed — appears before John can fully relay the information to Al. He and John face off in a hand-to-hand combat duel. John prevails. But now he must rush to save Holly and the hostages.
John now knows that he must get the passengers off of the roof before the detonators and C-4 take them all out.
When he kills the remaining men on the roof, John tells the hostages to go back down to the lower levels. He learns that Holly is with Hans somewhere below. The FBI gunships mistake him for a terrorist and John struggles to survive and eventually jumps off of the building while tied to a firehose. At that moment, the detonators go off, and a massive explosion engulfs the roof.
John finds Hans and the remaining men of his crew. Holly is with them. He faces off against Hans and one more henchman with a cleverly hidden gun trick, using his remaining two bullets.
While Hans falls out of the building, he grabs Holly, dragging her with him over the edge. John manages to save her just in time as Hans falls to his death.
Holly and John are reunited and kiss. He has killed the bad guys, saved the hostages, and reclaimed his marriage.
As John and Holly leave the Nakatomi Tower amidst the chaos of survivors, police, firefighters, and rescue crews, the conflict is over. They meet Al for the first time.
Karl, thought to be dead, emerges with a look of vile vengeance in his eyes as he aims an assault rifle at John and Holly.
Al reacts to the threat by drawing his weapon — the first time he’s done so since shooting a kid — and killing Karl.
John’s limo driver was trapped within the Nakatomi Tower’s garage throughout the whole ordeal. He even managed to take out one of Hans’s men during the final conflict.
He arrives in fashion, busting through one of the garage’s metal barriers. Al is ready to defend John and Holly, but John motions for him to lower his weapon when he sees who it is.
Argyle, the limo driver, pulls up to John and Holly and offers them a ride.
If you want to dig into The Hero’s Journey even more, ScreenCraft actually offers a great downloadable guide.


Kevin Nelson · July 11, 2022


Britton Perelman · July 22, 2022

Ken Miyamoto · July 18, 2022
Kevin Nelson · July 11, 2022

Britton Perelman · July 1, 2022